Tuesday, December 13, 2011

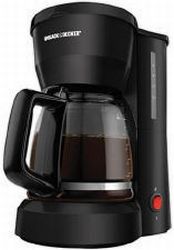
How does a Coffee Maker Work?

Have you ever wondered how a coffee maker works? Today, we are going to find out just how these mechanical wonders make our delicious morning cup of joe.  We will talk about the standard coffee maker model, you know the one that can be found in the majority of kitchens. Drip Coffee Makers. So just how do they work?

A drip coffee maker consists of three main components:
  1. The Reservoir: this holds the water that is poured into the coffee pot. At the bottom of the reservoir there is a hole.
  2. The Tube: you will also find that there will be a tube (usually white or clear) that leads up from the bottom of the base of the reservoir. This tube carries the hot water to the drip area. 
  3. The Shower Head: In the majority of drip coffee makers, above the basket that you will put your grounds in you will notice (usually on the lid) that there is a piece that resembles the shower head in your shower. The tube that was mentioned previously carries the hot water up to the shower head so that the water can be sprayed over (or dripped down on) the coffee grounds.
Those three main components, while very important, would not be able to work with what you will find in the bottom of the coffee maker.  Inside your coffee maker is a heating element. This heating element heats water that flows through an aluminum tube. This is the same heating element that keeps your coffee warm once it is made.

Water moves through your coffee pot through the help of gravity, and the bubbles from boiling water. This is why coffee makers tend to be very reliable machines, there aren't any pumps that can wear down or tear up. A great simplistic design is what brings you your coffee from a drip coffee maker each morning.


Wednesday, December 7, 2011

Where does Coffee Come From?


Coffee comes from the beans of the coffee plant, Coffea arabica. This plant is the most used plant in coffee production.  The coffee plant is a tropical plant that is very bush like and can reach 10-12 feet in height.  The coffee plant is not a winter hardy plant so it cannot be grown in temperate climate zones.  Coffee requires warm weather and a lot of water, fertilizer, and it also prefers alkaline (basic) soils.  The coffee beans are the seeds of the plant, these seeds have caffeine in them which is the plant's natural defense against the insects and animals that eat them.  

Coffea arabica is considered to produce the best flavor when brewed in a coffee pot.  Other types tend to be to bitter and/or bold.  Cheaper coffee brands may have a mixture of Coffea arabica and a substandard species.  Typically, you will be able to tell the difference.  

The process of going from bean on the plant to roasted beans ready to put in your coffee brewer is this:
  1. Coffee is picked.
  2. If picked green it is ripened.
  3. Beans are dried once ripened.
  4. Beans are roasted.
Four steps sounds simple enough right? Well, each of those steps has a series of sub-steps that must be followed. For more information do a search on these process in the making of coffee.

The color of the bean determines the boldness of the bean.  If the bean is a darker brown it will have a more robust flavor.  Once the beans have dried they will be sorted into these different grades.  Darker roasts are bolder because they have less fiber content a more sugar.  Lighter roasts have a complex and stronger flavor. 

To store the beans, an airtight container must be used and placed in a cool, dark, and dry place.  This will help maintain the flavors of the coffee.  Ironically, the bags we often purchase coffee in are not the best method for storing coffee. 

If you think you would like to have a coffee plant in your house, go ahead and get one!  Although, you should not expect to grow any coffee beans on it unless you live in the tropics.  The flowers are beautiful though!  If you live in a climate that is warmer most of the year they make a wonderful ornamental plant.

Friday, December 2, 2011

How to Make Peppermint Coffee

Tis the season for all things warm minty and sweet. Peppermint is definitely a flavor that makes me think about the holidays, snow, presents, and just all the warm fuzzies that go along with this time of the year.

Peppermint coffee really embodies the holidays for me. And for just a standard peppermint coffee it is quite easy to make. Just make your coffee as you normally do, then add a drop of peppermint extract (careful a little goes a long way!)

For a more coffee bistro style peppermint coffee try the recipe below:

Chocolate Peppermint Coffee


Ingredients:
  • Coffee made in your coffee maker
  • Candy Cane (small candy canes or the round hard peppermint candies also work)
  • Chocolate syrup
  • Milk
Directions:
  1. Make your coffee as usual, but leave it black, don't add sugar or creamer.
  2. Crush the candy canes. 
  3. Fill your coffee mug about 1/4 full of the milk and heat in the microwave for about 30 - 45 seconds.
  4. Pour the coffee over the warm milk, pour in some chocolate syrup (to taste) and add your crushed candy cane. Stir up your coffee. (adjust chocolate and peppermint to taste)
  5. If you want you can also add whipped topping, drizzle with chocolate sauce and sprinkle some more crushed peppermint on top of the whipped cream.

Sunday, November 27, 2011

How to Brew Great Coffee in a Drip Coffee Maker

Drip coffee makers are the most used coffee makers in households. These coffee makers are popular because they are easy to use. However, the coffee they make doesn't always come out tasting like the coffee you would purchase at your local coffee house. But there are definitely ways to make your drip coffee better.


Here are a few simple steps for you to keep in mind:
  1.  Use a Coffee Grinder. Coffee that is ground right before you use it it has a richer flavor due to the release of oils. 
  2. Use quality coffee. The better the quality of the coffee you start with, the better the final product will be. Coffee that has been vacuum-sealed is better, the seal keeps the beans or grounds from getting stale as quickly as coffee that is left sitting out in bins.
  3. Keep your coffee maker and pot clean. You will want to wash out your pot and filter basket every time you make a pot of coffee and it is a good idea to clean the coffee maker at least once a week. Each month you will also want to descale your coffee maker and be sure to clean the part of the coffee maker where the water drips out into the filter. If your pot is stained you might want to read How to Clean a Coffee Pot.
  4. Paper coffee filters are best for taste. Many people prefer to use the permanent filters because of the environment, however, if you compost, most paper coffee filters can be tossed into the compost with the coffee grounds. Whichever method you decide to use is ultimately up to you, but for better flavor, the paper filters are recommended.
  5. Be sure that you are using enough coffee. You will want a full tablespoon of ground coffee for every 8 ounces of water. Speaking of water, the best water to use is fresh cold water.
  6. Do not use the brew pause. It will muddle the strength of the coffee.
  7. If your coffee is left on the warming plate it will continue to heat which will change the flavor of it. The best method is to pour leftover coffee into a thermal pot or big thermal mug. It is preferable to make just enough coffee for what you will drink in an hour, but sometimes that isn't ideal for your schedule. But keep in mind the longer coffee sits the more the taste will start to become bitter.

Tuesday, November 22, 2011

Holiday Coffee for the Guests

Ah, you know the holidays have arrived when friends and relatives are drifting through your home, stopping for family gatherings, general chit chats, and just to say hello. And, as any good host or hostess, we are sure you offer them something to drink, a little cup of refreshment to sip on while you while away the time catching up, or while you work side by side preparing for a big family dinner. On cold days, many people prefer coffee, tea, hot chocolate or some other similar beverage. So how do you accommodate so many different tastes without have to take a lot of extra time making all these drinks for your guests as they pass through?

One solution is a coffee maker that uses the K-cups. One type of those coffee makers is the Keurig Coffee Brewer or another is the Cuisinart Single Serve Brewer. With these types of coffee makers you can have a fresh cup of coffee in just a few moments. Your guest can choose their coffee flavor, or they can choose tea if they are not in the mood for coffee. Coffee k-cups come in many varieties of flavors, so you are sure to find something to suit nearly every taste-bud you come across over the holidays.


Thursday, November 17, 2011

How to Use a French Press


You may have heard people talking about how much they love coffee when it is made using a french coffee press and you are now curious about how to use one before making an investment. 

It is highly recommended that you boil the water before you start grinding your coffee beans. This helps to ensure that the water will cool down to the right temperature to help prevent the coffee from being scalded. To heat your water you can use a tea kettle to make pouring the water out easier once you are ready for it. Heat the water between 190 and 200 degrees.

While you are waiting on your water to heat you will want to remove the lid and plunger/filter assembly from your press. Pull the plunger unit straight up and out. To warm the glass of the press so that your coffee will stay hot you will want to fill the press with hot tap water. Once the water in the kettle has finished heating, pour the water out of your french press. 

While waiting on the boiled water to cool some, grind your coffee to a medium or coarse grind. It is recommended to use a larger grind so that you will not clog the mesh filter on your french press.

Most people use 1 tablespoon of coarsely ground coffee per 5 ounces of water, but you will want to adjust how much coffee grinds you use to your preferred strength of coffee. 


Put the amount of coffee grounds you desire into your french press. Slowly pour your almost boiling water from the kettle over the ground coffee, filling press to the desired level. Most of your coffee will float. To get the coffee grinds to sink you can gently, briefly stir the water.

Place the lid and plunger/filter assembly into the brew keeping the plunger just 2 inches into brew. Allow coffee to steep for about 4 minutes for a large pot or 2 to 3 minutes for a small pot BEFORE pressing.

After your coffee has steeped for the proper amount of time, hold the press lid with one hand and using slow, steady pressure, depress the plunger while keeping the rod upright. There should be some resistance, but not too much. If you press to quickly or tilt the rod you could ruin your coffee by letting the grounds escape from beneath the filter, or you could overflow the pot. If you overflow the pot you could possibly scaled yourself as excessive force can cause the liquid to shoot out of the pot.

Allow all the sediment and grounds to settle for 30 seconds before pouring your coffee.

Turn the lid on your press so that the pour spout is open. Now you can pour yourself a cup of coffee. To ensure that you do not spill coffee hold onto the lid of the press while pouring.

It is not advisable to let the coffee sit in the press for an extended amount of time. If you made a large pot of coffee to drink over a long period of time, pour the extra coffee into a thermos after you have brewed it.

Be sure to wash your pot after using to get rid of any residues or oils.


Thursday, November 10, 2011

Upcycle/Recycle Used K-cups

Single serve coffee makers are great, convenient, and awesome in that you can use a different flavored k-cup every time. You aren't stuck to using the same flavor coffee until you replace the bag. But that is a lot of k-cups to throw away. Even if you just drink one cup of coffee each morning that is 365 a year that are thrown away.

So what can you do with those k-cups?

Here is one idea:

Use for starting small seedlings:

Perforate the bottom of the k-cup. Place in a tray of sand. Fill with soil and place one seed into each pod.

Reuse these guys.
Related Posts Plugin for WordPress, Blogger...